Wedding Vendor Invoicing — Generate GST Invoices, Track Payments & Get Paid Faster
Create professional proforma and tax invoices for wedding clients. Track advance payments, send GST-compliant invoices, and manage your cash flow — all from your vendor dashboard on itsmy.wedding.
How do wedding vendors create invoices and track payments from clients?
Wedding vendor invoicing in India is still largely manual — most photographers, decorators, and planners send payment requests over WhatsApp, track advances in notebooks, and create invoices in Word or Google Docs at tax filing time. During peak wedding season, this leads to missed payments, unclear outstanding amounts, and last-minute scrambles for GST-compliant documents.
On itsmy.wedding, invoicing is built directly into your workflow. When a client accepts your quotation, a draft invoice is automatically generated with all the line items and totals already filled in. You just add your bank details, set a due date, optionally add GST, and send. The client receives a professional invoice link and can download a PDF.
You can record payments as they come in — advance deposits, milestone payments, and final balances. The system tracks what has been paid versus what is outstanding. When the full amount is received, you convert the proforma invoice to a GST-compliant tax invoice with one click.
For clients who found you outside the platform — through WhatsApp, Instagram, or referrals — you can create standalone invoices without needing a quotation. Every invoice gets a unique number, a shareable link, and a downloadable PDF.
TL;DR
Generate professional invoices automatically from accepted quotations, or create standalone invoices for any client. Add GST if registered, track advance and milestone payments, and convert to tax invoices after full payment. Every invoice gets a unique number, share link, and downloadable PDF.
Open the Invoices page

From your vendor dashboard, navigate to Invoices. At the top you see three key numbers: total amount invoiced, amount received, and outstanding balance. This gives you an instant snapshot of your cash flow.
Below that, filter tabs let you switch between All, Draft, Sent, Paid, and Overdue invoices. Each invoice row shows the invoice number (e.g., MEER-2026-0001), client name, amount, status badge, and due date.
If a quotation was recently accepted, you will see a draft invoice already waiting — the system creates it automatically so you do not have to start from scratch.
Create an invoice
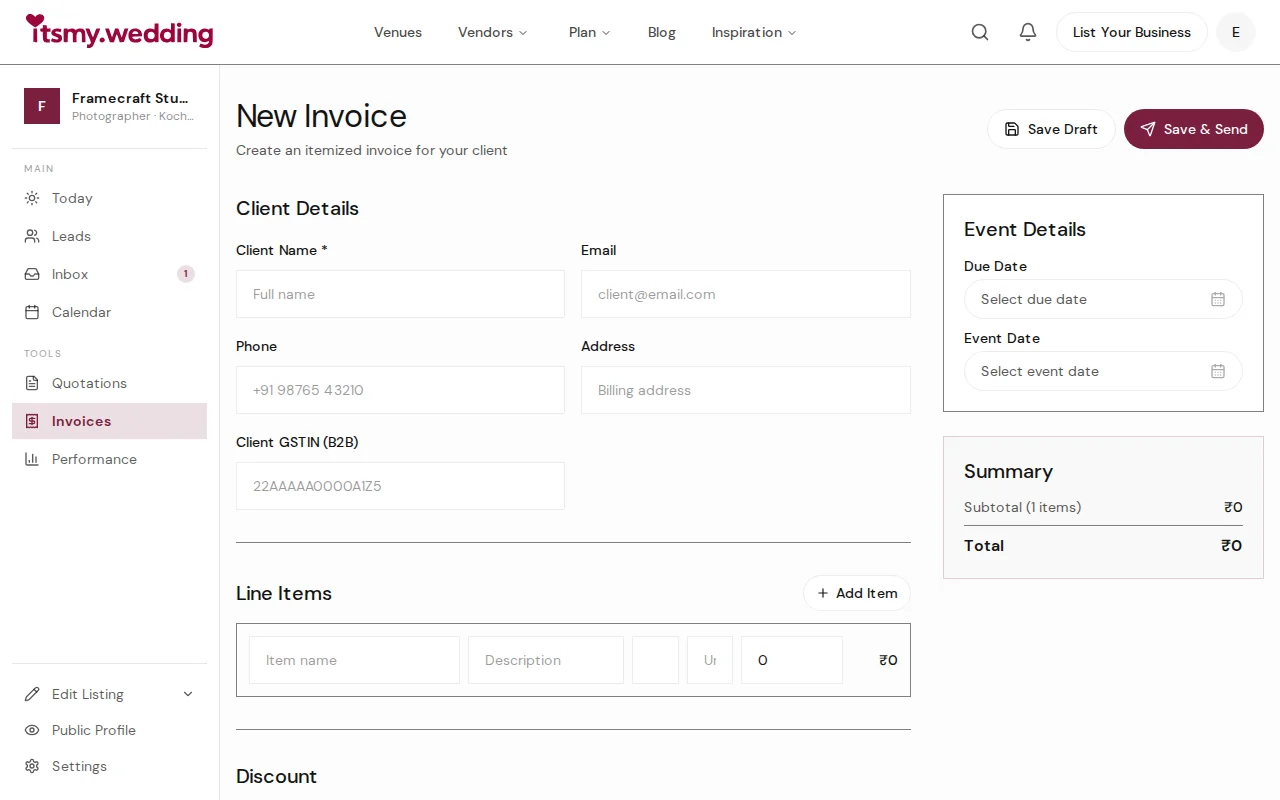
Click New Invoice to create a standalone invoice, or click Create Invoice on any accepted quotation to pre-fill from the quote.
The invoice builder has three sections. On the left: client details (name, email, phone, address, and their GSTIN for B2B clients). In the middle: line items with quantity, rate, and auto-calculated totals. On the right sidebar: a running summary showing subtotal, discount, tax, and grand total.
Each line item has a label, description, quantity, unit, and rate. Add as many items as you need. Remove items by clicking the trash icon. The summary updates in real time as you build.
Add GST and payment details
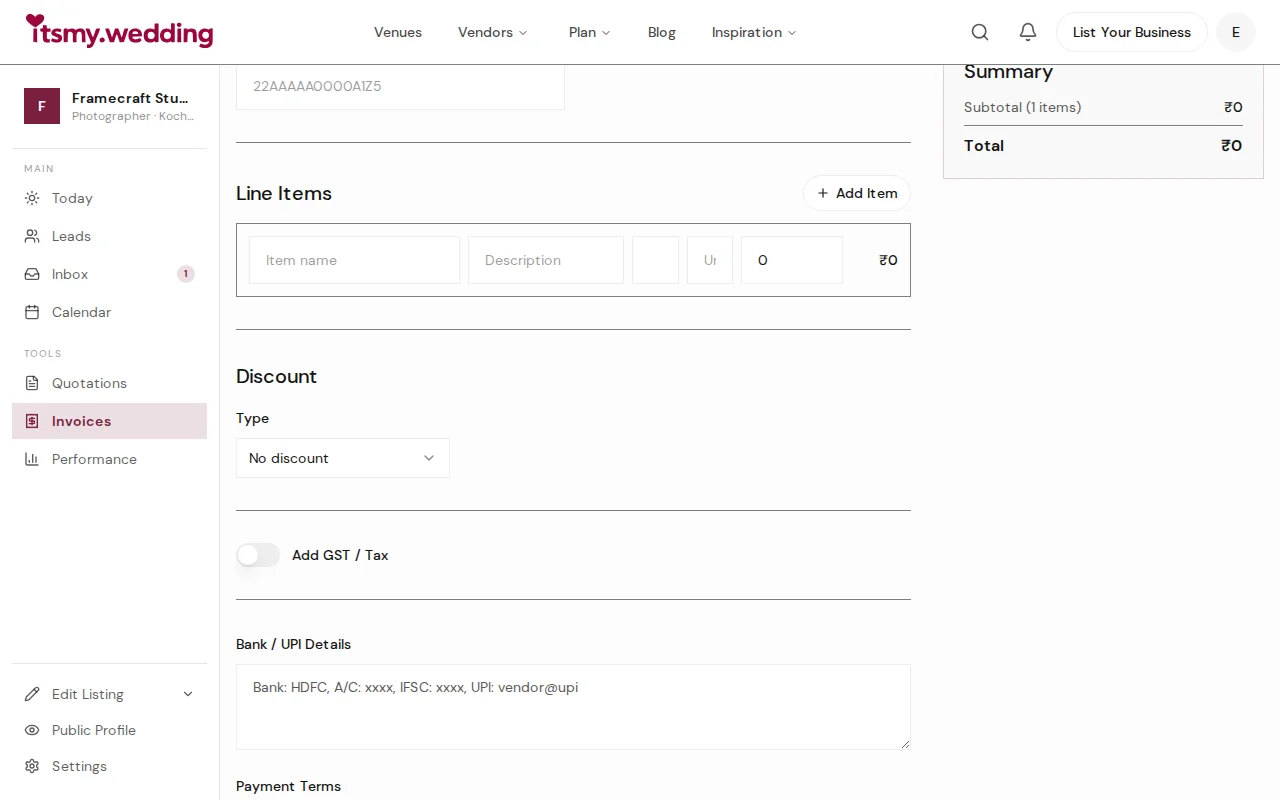
If you are GST-registered, toggle Add GST / Tax to expand the tax section. Enter your GSTIN, set the tax rate (typically 18% for wedding services), and choose whether it is intra-state (CGST + SGST) or inter-state (IGST). The system splits and calculates the tax amounts automatically.
Below that, add your bank details — account number, IFSC code, UPI ID. This appears on the invoice so the client knows exactly where to send payment. Set a due date and any payment terms (e.g., "Due within 7 days of event").
If you do not have a GSTIN, simply skip this section. The invoice will show clean totals without any tax breakdown.
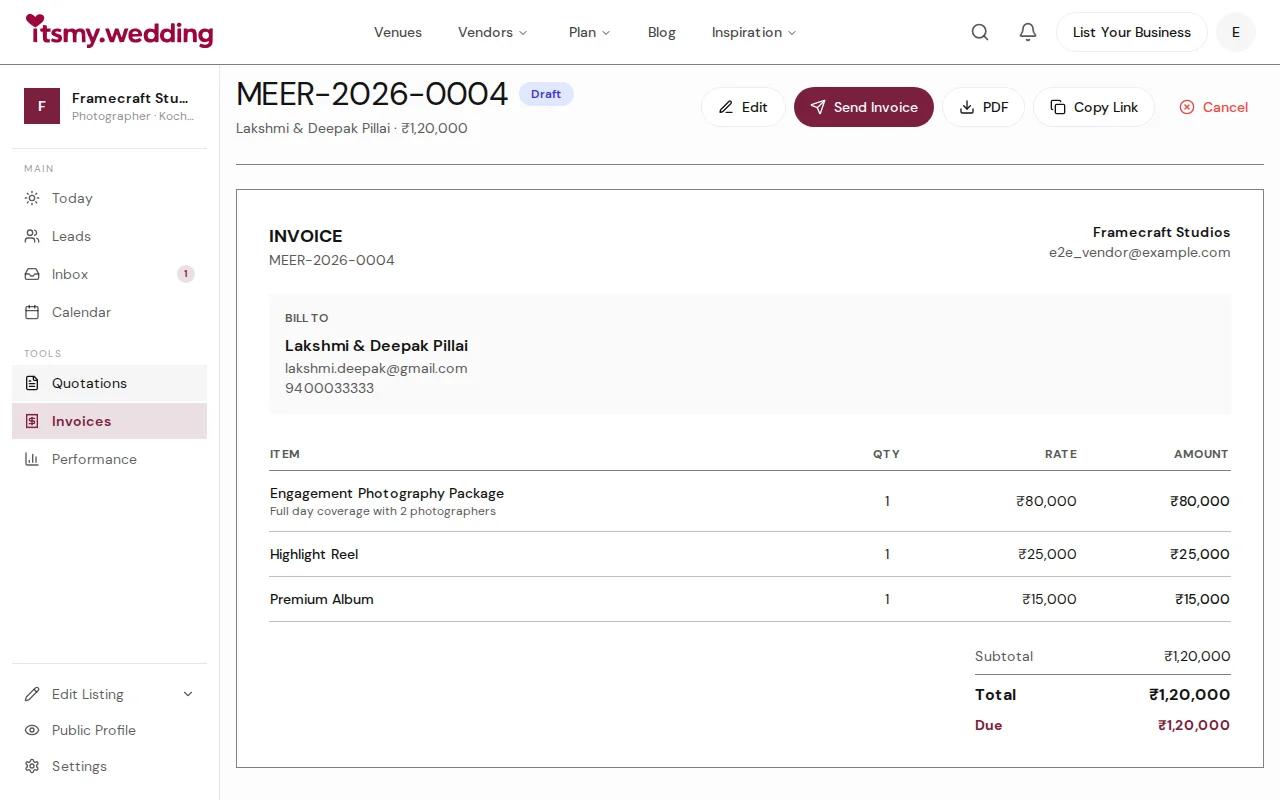
Send the invoice to your client

You have two options: Save Draft to review later, or Save & Send to create and send immediately.
When you send, the client receives an email with the invoice summary and a link to view the full invoice. The invoice page works on any device without the client needing an account — perfect for sharing via WhatsApp.
From the invoice detail page you can also: copy the share link, download the PDF, record payments, or cancel the invoice. Once sent, the invoice content is locked — no accidental edits after the client has seen it.
Record payments as you receive them

When you receive a payment — whether by bank transfer, UPI, cash, or cheque — click Record Payment on the invoice. Enter the amount received, select the payment method, and optionally add a reference number (UTR, transaction ID) and a note.
The system supports partial payments. If a client pays an advance of 25,000 on a one lakh invoice, the invoice shows "Partially Paid" with 75,000 remaining. When the full amount is received, the status changes to "Paid" and you see a prompt to convert it to a tax invoice.
All payment records are stored with timestamps and appear in the payment history — both on your dashboard and on the client-facing invoice page.
Convert to a tax invoice after full payment
After the full amount is paid, a Convert to Tax Invoice button appears on the invoice. One click changes the document type from "Proforma Invoice" to "Tax Invoice". The invoice number stays the same — only the header and type change.
The PDF regenerates automatically with "TAX INVOICE" at the top. This document includes your GSTIN, the tax breakdown, and all payment records — everything your accountant needs for GST returns and year-end filing.
Once converted, the invoice is locked permanently. No further changes can be made, ensuring the tax record is tamper-proof.
Next Steps
- Create professional quotations — send itemized quotes that auto-generate invoices when accepted
- Track payments on bookings — manage payment milestones for confirmed events
- Manage all your leads — track every client from inquiry to booking in one pipeline
Frequently Asked Questions
Keep learning
Related Guides

Professional Wedding Quotations — Create, Share & Track Itemized Quotes
Create detailed, itemized quotations for wedding clients with line items, optional add-ons, discounts, and terms. Share via link or PDF, track acceptance, and auto-generate invoices.

Wedding Booking Management — Send Quotes & Confirm Events Online
Manage booking requests, send professional quotations, and confirm wedding events from your vendor dashboard on itsmy.wedding.

Wedding Payment Tracking — Milestones, Deposits & Due Dates for Vendors
Track deposits, milestone payments, and due dates for every wedding booking. Stay on top of collections with payment tracking on itsmy.wedding.